Direct Answer: Category 3 contents cleaning requires a strict four-stage decontamination workflow—physical gross soil removal, surfactant washing, full wet dwell-time application of an EPA-registered disinfectant, and potable rinsing plus controlled drying—backed by chemical, temperature, wastewater, and post-cleaning verification logs tied to every restored line item.
.md twin for estimator QA and carrier file documentation.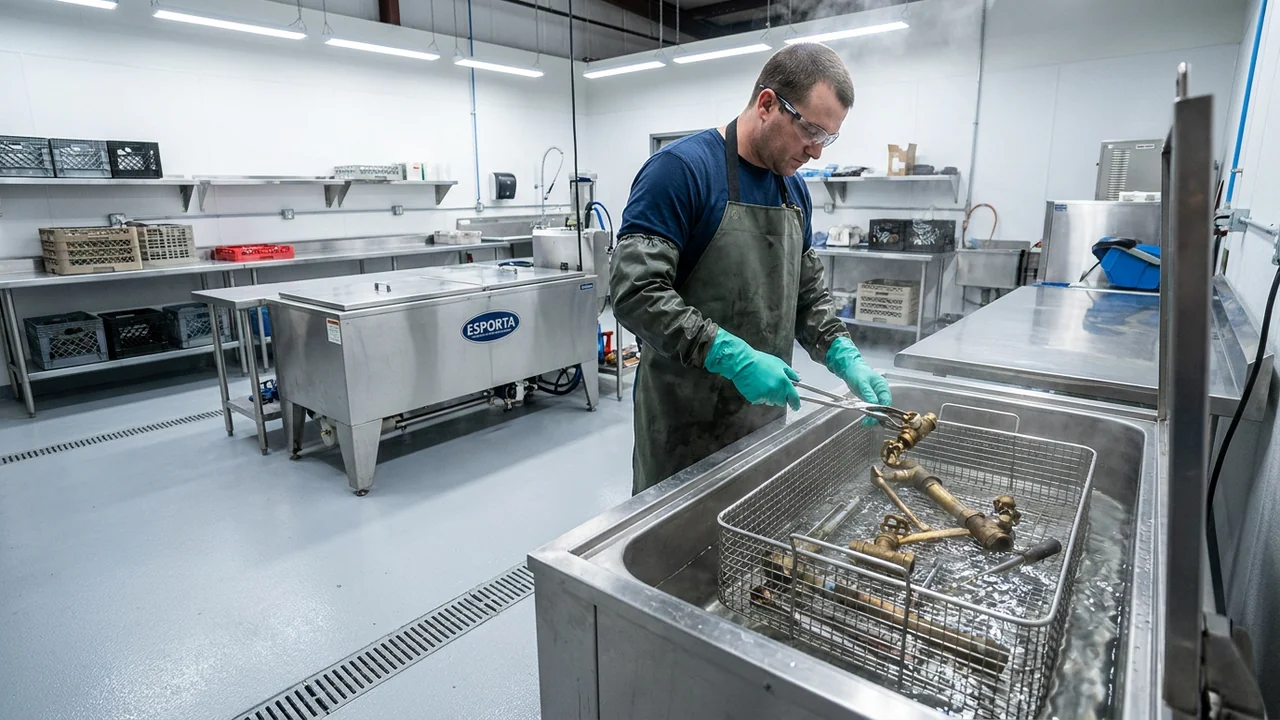
Declaring a non-porous asset restorable after Category 3 sewage or floodwater exposure is only half the obligation. The harder operational and compliance challenge happens inside the processing plant or mobile decontamination tent, where technicians must convert pathogen-contaminated ceramics, cookware, metals, plastics, and select textiles back into hygienically clean property without cross-contaminating clean staging racks or damaging delicate finishes.
Across the restoration industry, the single most common Category 3 processing failure is applying disinfectant too early. Spraying a quaternary ammonium or hydrogen-peroxide biocide onto dried river silt, cooking grease, or fecal biofilm does not sanitize the object—organic soil chemically binds and neutralizes active antimicrobial ingredients on contact. Under ANSI/IICRC S500 and ANSI/IICRC S320, thorough physical cleaning must always precede disinfection.
Equally critical for carrier approval and regulatory defense is processing documentation. Adjusters scrutinize Category 3 cleaning invoices when crews submit generic lump-sum labor hours without chemical logs, dwell-time verification, wastewater containment compliance under US EPA waste guidelines, or pre- and post-cleaning QA sign-offs. Structured documentation proves the work justified its price and protects the contractor from liability.
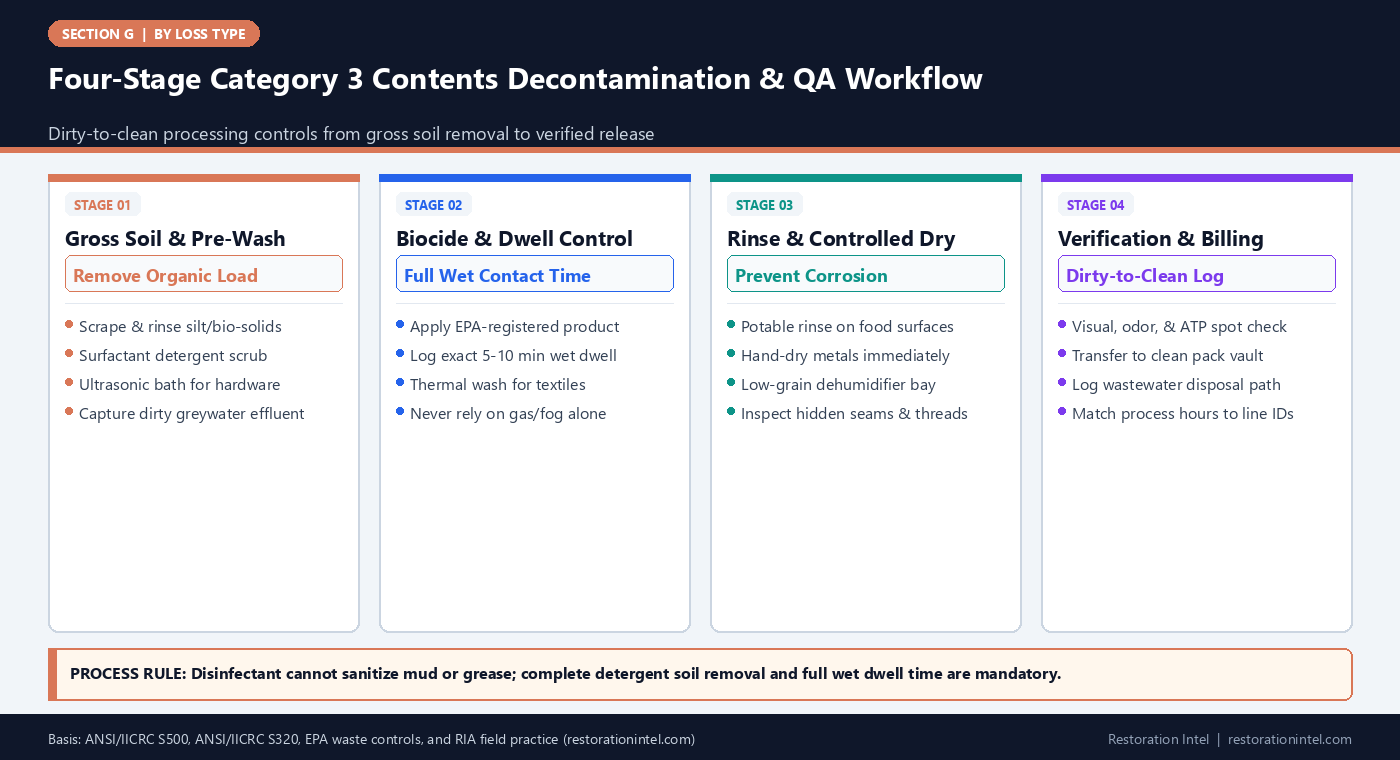
Four-Stage Category 3 Contents Decontamination & QA Workflow
Category 3 Cleaning Methodology, Process Controls & Verification by Asset Class
Approved decontamination pathways and documentation gates for restorable non-porous and launderable contents.
| Restorable Asset Class | Approved Processing Sequence | Critical Process Parameter | Post-Clean Verification | Immediate Disqualification Trigger |
|---|---|---|---|---|
| Glassware, Porcelain & Stainless Cookware | Pre-rinse -> alkaline detergent wash -> EPA-registered sanitizer immersion -> potable rinse -> heated dry | Full label wet contact time followed by food-safe potable water rinse | Zero residue, spot-free sheen, and optional ATP swab check on food rims | Cracked glaze, crazing, or porous wooden handles permanently loose |
| Solid Hardwood & Sealed Metal Furniture | HEPA dry prep (if dry silt) -> damp detergent wipe -> targeted disinfectant mist/wipe -> immediate dry & polish | Avoid standing water on wood joints; wipe dry promptly to prevent grain raise | Dry moisture reading at baseline, zero odor at seams, intact finish | Swelling joints, clouding finish lift, or persistent sewage odor in underside |
| Rigid Plastics, Sports Gear & Hard Toys | Gross debris flush -> warm surfactant immersion or pressure-controlled wash -> biocide bath -> potable rinse | Verify plastic is solid-walled with zero hollow internal water-trap cavities | Visual inspection of crevices and neutral clean smell after drying | Hollow seam rattle indicating trapped floodwater or brittle UV cracking |
| Machine-Washable Textiles & Linens | Heavy pre-flush -> enzyme detergent wash -> EPA-registered laundry sanitizer + thermal cycle -> sealed drying | Match water temperature and cycle length to label sanitizer efficacy rating | Zero stain shadow, clean odor test, and zero shrinkage or dye bleed | Permanent sewage staining, fiber rot, or shrinkage after test garment |
| Non-Powered Hand Tools & Metal Hardware | Degrease/silt strip -> ultrasonic cavitation bath -> disinfectant wipe -> potable rinse -> corrosion-inhibitor oil | Immediate moisture displacement and light oil barrier after final rinse | Smooth hinge/ratchet action, zero flash rust, clean recessed knurling | Seized bearings, severe pitting, or insulated grips soaked internally |
| Solid Stone Decor & Glazed Ceramics | Brush dry silt -> pH-neutral stone cleaner -> compatible non-acidic disinfectant -> clean damp wipe & dry | Never use acidic or bleach chemicals on marble, travertine, or limestone | Intact stone polish, zero chemical etching, and neutral surface odor | Deep unsealed stone staining or cracked adhesive mounts |
Executing the Four-Stage Category 3 Decontamination Sequence
Professional Category 3 contents cleaning depends on unidirectional workflow separation: dirty receiving, wet decontamination, controlled drying, and clean vault packaging must occupy physically distinct zones so technicians never carry contaminated spray mist or footwear residue onto freshly sanitized goods. As detailed in IICRC Cat 3 Contents Pack-Out Protocol, every bin entering the wash bay stays in dirty custody until it clears final drying and inspection.
Stage one is mechanical and chemical soil removal. Technicians flush heavy silt, dried mud, and organic debris over screened capture basins, then wash every crevice using an appropriate surfactant detergent and soft nylon brushes or ultrasonic baths. Stage two applies an EPA-registered broad-spectrum disinfectant strictly according to label dilution and wet dwell time—commonly five to ten minutes depending on the active chemistry—re-wetting surfaces if rapid evaporation threatens to cut dwell short.
Stage three completes potable-water rinsing—essential on food-contact dishes, children’s hard toys, and utensils so chemical residues do not remain—followed immediately by hand-drying or warm dehumidified air bays to prevent flash rust on carbon steel and water spotting on crystal. Stage four executes QA sign-off and transfers approved items into clean, sealed storage cartons.
- Directional bay zoning: Enforce one-way flow from dirty intake to wash bay, drying rack, QA bench, and clean pack-out vault.
- Timed dwell discipline: Use visible bench timers tied to the disinfectant label; wiping chemical off at 60 seconds invalidates sanitization.
- Food-contact potable rinse: Always finish cookware, plates, flatware, and drinkware with a clean potable rinse after biocide dwell unless using a verified no-rinse food-contact concentration.
Ultrasonic Immersion, Textile Sanitization, and Finish-Safe Controls
Hand scrubbing alone cannot reach inside ornate metal filigree, threaded tool chucks, or fine crystal etching where flood silt settles. Ultrasonic cavitation tanks solve that geometry problem by generating microscopic imploding bubbles inside heated detergent solutions, lifting trapped silt out of blind recesses without abrasive scouring. Following the ultrasonic wash cycle, non-porous parts move into a dedicated disinfectant dip or wipe station, potable rinse, and corrosion-inhibitor drying step.
Launderable household textiles require equally tight parameter control. Simply tossing sewage-exposed linens into a standard home washer risks spreading pathogens into machine gaskets while cold water leaves bacteria intact. Commercial contents plants process salvageable textiles in dedicated contaminated-intake washers using heavy pre-flushes, enzyme detergents, EPA-registered laundry sanitizers, and validated water temperatures compatible with each fabric label.
Finish compatibility remains a constant safeguard across mixed materials. High-pH alkaline degreasers pit bare aluminum cookware, acidic descalers etch natural marble decor, and chlorinated bleaches corrode stainless flatware or weaken nylon straps. Selecting chemistry matched to the substrate preserves pre-loss appearance while achieving full microbial reduction.
- Ultrasonic bath hygiene: Change ultrasonic tank fluid on a strict batch schedule so suspended sewage silt does not redeposit onto subsequent lots.
- Test-piece check first: Run one representative item before batching delicate plated metals, antique silver, or dyed textiles.
- pH-matched chemistry: Keep pH-neutral detergents dedicated for stone, lacquer, and anodized aluminum rather than using one harsh degreaser across all bays.
Why Ozone, Hydroxyl, and Fogging Alone Never Replace Physical Washing
A persistent misconception in field restoration is that placing Category 3 items inside an ozone chamber or running a ULV cold fogger inside a pack-out trailer constitutes complete decontamination. While hydroxyl generators and controlled ozone treatments can help neutralize lingering volatile organic odor molecules after cleaning, neither gas-phase oxidizer penetrates dried mud, biofilm crusts, or interior foam cavities at field-safe concentrations.
Both ANSI/IICRC S500 and ANSI/IICRC S320 stress that antimicrobial efficacy requires physical removal of dirt and organic matter before targeted surface contact. Worse, blasting high-concentration ozone onto damp rubber gaskets, elastic waistbands, natural latex, or uncleaned metal hardware can oxidize polymers and accelerate surface degradation without solving the underlying biological load.
Treat deodorization equipment strictly as a secondary polishing step after wet washing and drying—never as a shortcut around scrubbing, immersion, or discarding saturated porous goods. Carriers trained by the Restoration Industry Association (RIA) routinely reject standalone fogging or ozone charges billed in place of verified Category 3 washing.
- Zero shortcut rule: Never bill or certify ozone or fogging alone as Category 3 sanitization on unwashed contents.
- Rubber & polymer guard: Keep natural rubber seals, elastic garments, and fine artwork out of aggressive ozone exposure bays.
- Post-wash odor test: Sniff seams, gaskets, and hollows after full drying; persistent sewage odor signals trapped internal contamination requiring re-evaluation or condemnation.
Wastewater Containment, Chemical Logs, and Carrier-Ready Documentation
Cleaning sewage-contaminated contents generates contaminated wash effluent, mud sludge, and spent PPE—materials that cannot simply be hosed into a residential driveway storm drain. Storm sewers discharge directly to local waterways, creating severe environmental violations. Crews operating mobile wash stations or warehouse bays must capture wash water through sediment traps and route effluent only into approved sanitary sewer connections or regulated holding tanks per local utility and US EPA waste frameworks.
Meanwhile, the estimating file must prove every step happened as billed. A defensible Category 3 processing packet records the specific EPA registration number and dilution ratio of the disinfectant used, batch start/end timestamps confirming wet dwell compliance, technician initials at dirty intake and clean QA release, and objective cleanliness checks (visual inspection, odor clearance, and ATP bioluminescence meter readings where contracted).
As emphasized in Two Standards, One Truck, pairing clear chain-of-custody box tracking with line-level cleaning logs prevents adjusters from slashing specialty decontamination labor down to basic dusty-wipe rates.
- Effluent disposal log: Record sanitary discharge permits, holding tank pump-out manifests, and sludge disposal receipts inside the job file.
- Batch chemical sheet: Log product name, EPA registration number, active dilution, and verified dwell minutes per shift.
- Before/after QA pairing: Attach pre-wash dirty photos and post-wash clean rack photos to each restored box or high-value line item.
Practitioner Verification Checklist (G-11)
- Maintain strict physical separation between dirty Category 3 receiving bays, wet wash stations, drying zones, and clean storage vaults.
- Complete thorough detergent soil and silt removal before applying any EPA-registered disinfectant, and enforce full label wet dwell times.
- Follow disinfection with a potable water rinse on all food-contact items and dry metals promptly with moisture-displacement protection.
- Capture and route all contaminated wash effluent to approved sanitary connections or holding tanks—never to street storm drains.
- Archive batch chemical logs, technician QA sign-offs, and pre-/post-cleaning photos linked to line-item cleaning charges.
Standards, Authority References & Related Reading
Primary standards, insurance definitions, and sibling Restoration Intel guides referenced in this brief:
- ANSI/IICRC S500 Water Damage Standard
- ANSI/IICRC S320 Standard for Professional Contents Restoration
- US EPA Hazardous Waste Framework
- Restoration Industry Association (RIA)
- Related Guide: Category 3 Sewage & Floodwater Losses: Non-Salvageable vs Restorable Criteria
- Related Guide: Category 3 Sewage & Floodwater Losses: Damage Evidence & Forensic Photography Rules
- Related Guide: IICRC Cat 3 Contents Pack-Out Protocol
- Related Guide: Before Anything Goes: The NFIP Contents Inventory
- Related Guide: Two Standards, One Truck: Documentation When the Brand and the Scorecard Disagree
.md twin for desk QA and team training.Frequently Asked Questions
Why can't technicians spray disinfectant directly onto mud-coated flood items to save time?
Organic silt, mud, and sewage solids neutralize chemical disinfectants on contact and shield pathogens underneath. ANSI/IICRC S500 and S320 require physical soil removal before biocide application.
Is ozone or thermal fogging enough to sanitize Category 3 floodwater contents?
No. Gas-phase ozone and cold fogging do not penetrate mud films or reliably eliminate sewage pathogens inside porous cores; they serve only as secondary odor treatments after physical washing or on non-Category 3 odors.
What documentation do carriers expect on Category 3 contents cleaning invoices?
Adjusters look for itemized restorable asset lists, pre-wash contamination photos, EPA-registered disinfectant logs with dwell times, technician QA sign-off, and clear economic proof that cleaning costs stayed well below replacement value.
Where must wash water from mobile on-site Category 3 cleaning tents be discharged?
Captured wash effluent must go through sediment screening into an approved sanitary sewer cleanout or sealed pump-out holding tank per municipal utility and environmental rules—never into gutters or storm drains.