Direct Answer: Inspect and photograph every furniture piece, appliance, rug, and breakable asset for pre-existing scratches, chipped veneer, loose joinery, pet wear, and fading before a moving blanket or strap touches it—using neutral defect phrasing that protects both contractor liability and fair ACV condition grading.
.md twin for estimator QA and carrier file documentation.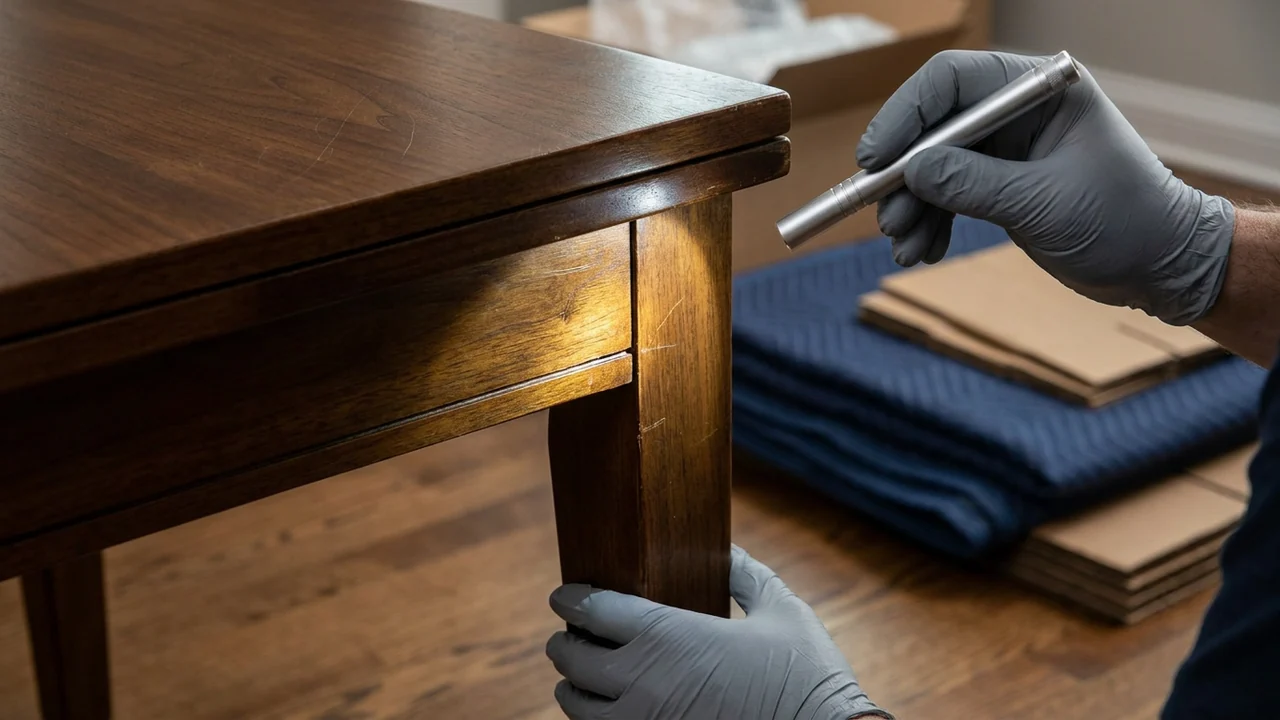
Few moments sour a homeowner reset faster than pulling back a quilted moving pad in the living room to hear, ‘That deep gouge on my dining table leg was definitely not there before you packed it.’ Without timestamped, pre-touch macro photos and a signed pre-existing condition log taken before the first pad strap closes, the restoration contractor has no objective defense—and pays for decades-old wear out of pocket.
Just as importantly, accurate pre-pack documentation protects the insured and the estimating desk under ANSI/IICRC S320 and IRMI depreciation standards. Distinguishing normal minor wear from sudden fire or water damage ensures fair Actual Cash Value (ACV) condition grading without wrongly penalizing well-kept furnishings.
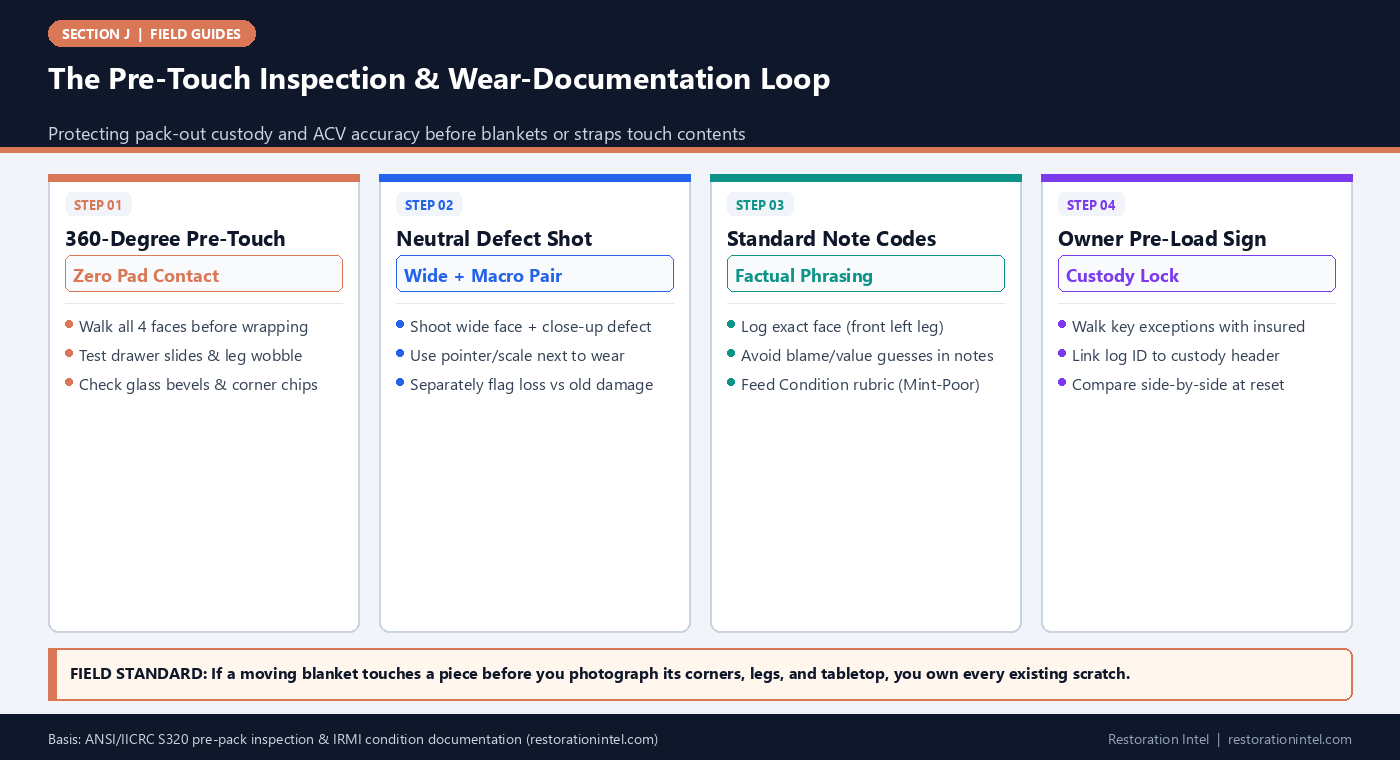
The Pre-Touch Inspection & Wear-Documentation Loop
Pre-Existing Damage Inspection & Standardized Defect Phrasing Guide
Check high-wear touchpoints on every item prior to wrapping and record findings using neutral, location-specific phrasing.
| Asset Category | High-Wear Inspection Points | Pre-Existing vs Loss-Damage Clue | Mandatory Pre-Wrap Photo Pair | Standardized Defect Note Phrasing |
|---|---|---|---|---|
| 1. Wood & Veneer Casegoods | Tabletop edges, bottom plinths, front legs, drawer lips, pull hardware | Old scratches have darkened patina/dust inside; fresh gouges expose bright raw fibers | Full front/top overview + raking-light close-up of scratch/chip | 'Pre-existing 2-in surface finish scratch on front-right apron; minor corner veneer rub' |
| 2. Upholstered Sofas & Chairs | Armrest caps, front seat-cushion piping, lower rear corners, skirt hems | Pet clawing, sun-faded window side, worn cushion sag vs acute soot/water line | Full sofa elevation + macro of frayed piping/pet pulls + back corner | 'Pre-existing cat-claw fray on right-front arm; UV fade along rear back cushion' |
| 3. Glass Tops, Mirrors & Framed Art | Gilded frame miter corners, beveled glass edges, rear hanging wire/backing | Dust inside old frame splits or oxidized mirror silvering vs sudden impact cracks | Frame face + each corner miter + rear dust cover tear | 'Pre-existing 0.5-in corner gesso chip at bottom-left frame; aged mirror edge desilvering' |
| 4. Major & Stainless Appliances | Door front handles, lower toe-kick, side panels beside cabinets | Older dent scuffs with zero paint crack or pantry-door rub marks | Straight-on stainless reflection shot + tight corner dent macro | 'Pre-existing shallow dent mid-lower freezer door; minor handle rub wear' |
| 5. Consumer Electronics & Monitors | Screen anti-glare coating, plastic bezel corners, stand base, rear ports | Micro-scratches and dead pixels vs melted plastic or wet port oxidation | Off-screen raking reflection shot + bezel corner + rear I/O ports | 'Pre-existing hairline bezel scuff on top-left corner; light screen cleaning swirls' |
| 6. Area Rugs & Window Coverings | Fringe ends, traffic-lane pile crushing, pet stains, blind slats/cords | Uniform traffic path wear and yellowed pet spots vs fresh Category 1/2/3 tide line | Full rug overhead + worn fringe/traffic macro | 'Pre-existing worn fringe along east edge; flattened central pile wear' |
| 7. Garage Tools, Bikes & Fitness Gear | Pedal/handlebar grips, mower decks, powder-coat chips, rust on unplated steel | Oxidized dark surface rust and grease buildup vs fresh white zinc/acid pitting | Side profile + rusted weld/chip macro | 'Pre-existing surface rust on lower frame rail; scuffed handle grips from prior use' |
The Pre-Touch Rule: Why Inspection Happens Before Wrapping
In a busy pack-out, wrapping crews follow closely behind inventory technicians with quilted pads, stretch film, and dollies. If a technician skips inspecting the back legs of a dining table or the bottom corners of a gilded mirror because ‘the wrapping crew is waiting,’ any pre-existing looseness, gesso chip, or worn veneer disappears under blue moving pads for months. When the piece is unwrapped at reset, the timestamped photo trail only shows an unblemished distant wide shot—making every old defect look like transit damage.
Make the 30-second Pre-Touch Inspection mandatory on every Tier 1 and Tier 2 furniture piece, mirror, framed artwork, and appliance. Walk all four sides, lightly test drawer glide and leg wobble without forcing stuck wood, and shoot raking-light close-ups of every notable blemish before a blanket is lifted.
- Pad-off inspection rule: Never let moving pads, corner guards, or tape touch an item until pre-existing defects are photographed and logged.
- 360-degree check: Pull freestanding pieces gently three inches from walls (when safe) to inspect hidden rear legs and back panels.
- Wobble & joinery flag: Note loose chair spindles, unglued veneer lips, or missing drawer pulls immediately so movers pack or brace appropriately.
Separating Pre-Existing Wear from Acute Loss Damage
Field crews and adjusters frequently argue over whether a defect existed before the fire or flood or occurred during the loss or pack-out. Physical clues usually settle the question objectively. Old wood scratches carry darkened polish, wax buildup, or household dust inside the groove, whereas fresh handling gouges expose bright, clean, unoxidized wood fibers. Similarly, long-term sun fading follows window-facing arms and backs, whereas water damage leaves distinct tide rings and mineral salt lines.
Never guess cause or fault in the inventory spreadsheet (‘probably old dog scratch’ or ‘looks like homeowner dropped it’). Describe strictly what the eye and camera observe: exact location on the piece, size in inches, surface character, and whether soot or water sits on top of or underneath the blemish.
- Soot-under-scratch clue: On fire jobs, a clean bright scratch cutting through dark soot indicates fresh post-fire contact; soot sitting inside a worn gouge proves it predated the smoke.
- Patina & dust clue: Oxidized dark edges on chipped porcelain or wood signal historical wear rather than acute pack-out impact.
- Factual, non-judgmental notes: Record dimensions and face position (‘1.5-in scuff, lower left panel’) rather than speculating on how it happened.
Using Pre-Pack Notes to Protect Fair Condition Grading and ACV
Pre-pack documentation does double duty: it shields the contractor from false damage claims and supplies honest, evidence-backed inputs for ACV depreciation. Without photographic context, desk examiners often apply blanket ‘Fair’ or ‘Poor’ condition deductions across an entire house based on item age alone. Conversely, documenting pristine, well-maintained wood surfaces and intact upholstery justifies ‘Mint’ or ‘Good’ effective-age condition grades that meaningfully reduce depreciation deductions.
When minor localized wear does exist—such as cat pulls on one corner of an otherwise clean sofa—documenting the exact scope keeps the estimator from downgrading the entire piece to ‘Poor.’ Pair every pre-pack note directly with your Condition-Grade rubric so field descriptions and valuation tiers never contradict each other.
- Mint/Good defense: Capture clean intact joints, crisp cushion loft, and scratch-free tabletops to substantiate above-average condition claims.
- Localized-wear precision: Distinguish ‘minor scuff on one bottom foot’ from ‘heavy structural wear’ so depreciation reflects true pre-loss value.
- Consistent rubric tags: Map pre-pack defect severity directly into the New / Mint / Good / Fair / Poor scale used by estimating.
Walking Exceptions With the Owner and Comparing at Reset
Surprising a homeowner at reset with a stack of hidden pre-existing damage notes causes defensiveness, even when the photos are accurate. Whenever the property owner is on site during pack-out, point out significant pre-existing fragility—such as loose dining chair joints, cracked mirror backing, or weathered patio finishes—in real time and invite their initials on the Pre-Pack Exception Log.
On return reset day, carry the exact pre-pack exception log and photo thumbnails onto the delivery tablet. When unwrapping major furnishings in front of the owner, showing the pre-pack baseline side by side confirms that the restoration team returned every piece in equal or better restored condition—turning potential claims into five-star sign-offs.
- Real-time owner walk: Flag loose joints, existing glass chips, and fragile heirloom finishes aloud before wrapping starts.
- Packing-risk disclaimer: Use written structural-fragility acknowledgment when packing severely dry-rotted or glued-split antiques.
- Reset-day baseline check: Verify unwrapped furniture against pre-pack photos before requesting the final delivery release signature.
Practitioner Verification Checklist (J-12)
- Inspect all four faces, bottom edges, corners, and joinery of every furniture piece and appliance before any pad or strap touches it.
- Capture a paired wide-context photo plus raking-light macro with size reference for every notable pre-existing scratch, chip, or fray.
- Use strictly factual, location-specific defect phrasing without speculation on fault or history.
- Distinguish acute loss damage (soot, tide lines, heat blister) from pre-existing patina, UV fade, and traffic wear to anchor ACV grading.
- Review significant pre-existing fragility with the owner on site, log on the Custody Exception sheet, and verify against photos at reset.
Standards, Authority References & Related Reading
Primary standards, insurance definitions, and sibling Restoration Intel guides referenced in this brief:
- ANSI/IICRC S320 Standard for Professional Contents Restoration
- Restoration Industry Association (RIA)
- IRMI Insurance Glossary: Actual Cash Value (ACV)
- IRMI Insurance Glossary: Depreciation
- Related Guide: Field Guide: The Universal Room-by-Room Contents Capture Order Checklist
- Related Guide: Field Guide: Chain-of-Custody Form Elements & Pack-Out Sign-Off Template
- Related Guide: Field Guide: Condition-Grade Definitions Rubric (New / Mint / Good / Fair / Poor / Damaged)
- Related Guide: Field Guide: Homeowner Reset, Unpack Verification, and Missing/Damaged Item Reconciliation Protocol
- Related Guide: Condition vs Chronological Age: Documenting Pre-Loss Care to Defend Lower Depreciation Percentages
.md twin for desk QA and team training.Frequently Asked Questions
How can technicians tell quickly whether a wood scratch happened before the loss or during pack-out?
Pre-existing scratches usually show darkened polish, household dust, or uniform patina inside the groove—and on fire losses, soot settles inside old gouges—whereas fresh handling scratches expose clean, bright raw wood fibers.
Should crews write 'homeowner damaged' in pre-existing condition notes?
No. Always use neutral, objective descriptions stating exact location, size, and appearance (for example, ‘Pre-existing 2-inch finish scratch on front-right apron’), never blame or speculation.
Does photographing pre-existing minor wear hurt the homeowner's insurance settlement?
No—honest baseline photos actually protect well-cared-for items from arbitrary blanket depreciation by proving overall Mint or Good pre-loss condition despite one minor scuff.
What if a piece of furniture is too fragile or loose-jointed to wrap and move safely?
Stop wrapping, photograph the loose joint or cracked veneer, walk the risk with the property owner, and record a signed fragile-handling acknowledgment before crating or moving.