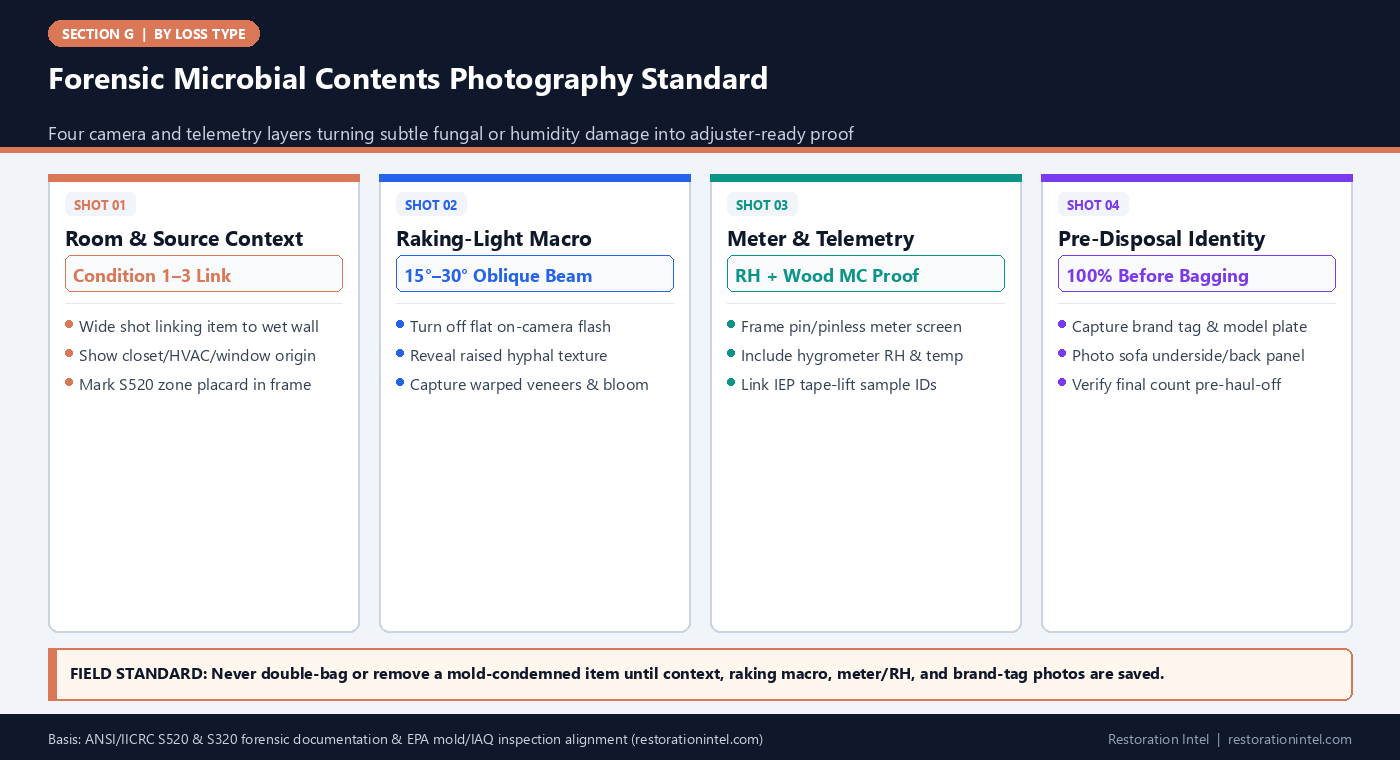
Direct Answer: Forensic photography on mold and prolonged-humidity claims must capture raking-light macro shots of hyphal growth and humidity warping paired with psychrometric RH/moisture readings, room-context Condition 1–3 boundaries, and pre-disposal rating-plate proof inside containment before any non-salvageable item is bagged.
.md twin for estimator QA and carrier file documentation.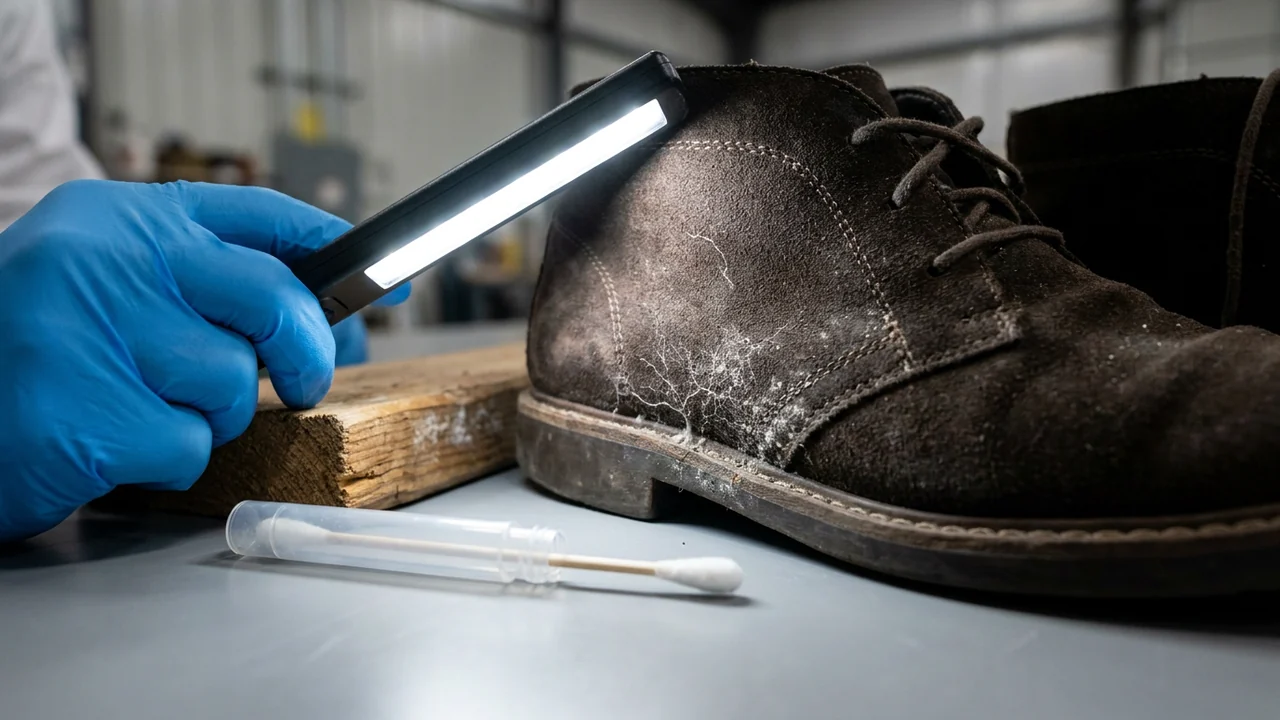
Microbial and prolonged-humidity contents claims suffer higher photo-rejection rates than fire or flood losses because light surface colonization and subtle moisture distortion disappear under flat camera flash. Straight-on smartphone snapshots wash out pale Aspergillus or Penicillium colonies on light upholstery, make green-gray hyphae look like ordinary household dust, and fail to show warped veneers or corroded electronics.
Meanwhile, desk examiners auditing files under ANSI/IICRC S520 and US EPA indoor air quality frameworks need proof of two facts before approving contents condemnation or specialty containment cleaning: first, that active Condition 3 growth or irreversible humidity damage existed on the specific item; and second, that environmental conditions inside the room corroborate the loss timeline and affected footprint.
Standardizing forensic lighting, moisture-meter framing, containment-safe device hygiene, and pre-disposal photo checklists under ANSI/IICRC S320 ensures every condemned mattress, colonized sofa, and warped heirloom cabinet carries self-evident proof—even weeks after hazardous debris leaves the site.
Forensic Microbial Contents Photography Standard
Forensic Photography & Evidence Pairing Rules for Microbial Contents
Required camera geometry, environmental proof, and common pitfalls across challenging mold and prolonged-humidity surfaces.
| Evidence Target | Camera & Lighting Technique | Environmental Proof to Pair | Common Field Mistake | Carrier Review Value |
|---|---|---|---|---|
| Pale / White Hyphal Growth | 15–30 degree raking LED flashlight; camera flash OFF | Room RH/temp hygrometer reading + nearby drywall growth shot | Direct flash bleaches white mold into invisible glare | Proves active raised biomass rather than surface lint |
| Upholstery & Mattress Undersides | Flip safely inside containment; wide shot + macro seam/dust-cover shot | Moisture meter reading on frame + IEP sample zone tag | Shooting only clean top cushions while mold hides underneath | Justifies porous Condition 3 condemnation immediately |
| Warped Wood & Lifted Veneer | Straightedge/level held across panel under oblique shadow | Pin-type wood moisture content (MC%) reading in frame | Top-down photo hides 1/4-inch cupping or veneer bubbling | Proves structural humidity damage beyond surface cleaning |
| Efflorescence vs Mold on Basement Goods | Close-up macro showing crystalline powder vs fuzzy filaments | Basement concrete RH/MC + perimeter containment boundary | Confusing mineral salt crust with fungal growth (or vice versa) | Protects estimator credibility during desk/IEP audit |
| Electronics & Optical Corrosion | Macro with diffused side light on rear vents, boards, or lens glass | Room humidity log + certified tech inspection tag | Photographing blank black screen without serial or internal port view | Supports corrosion total loss or specialty bench diag |
| Leather & Closet Wardrobes | Macro showing pitted grain/staining + closet wall context | Closet interior RH + hang-tag/brand label close-up | Lumping 40 garments into one blurry pile before sorting | Separates restorable Condition 2 from ruined leather/suede |
Using Raking Light and Color Contrast to Capture Faint Colonies
On-camera flash is the enemy of microbial evidence photography. Direct flash flattens surface relief, bounces specular glare off damp plastics or glossy paint, and erases translucent white, gray, or pale green fungal filaments on light-colored mattress ticking, drywall, and birch cabinetry. A desk adjuster looking at a flash-blown photo sees a clean white surface and rejects the replacement line.
Instead, photographers inside containment should disable automatic flash and hold a high-CRI inspection work light or flashlight at a 15- to 30-degree grazing angle across the affected surface. Raking light casts crisp micro-shadows behind fuzzy hyphae, highlights powdery spore rings, and exposes subtle veneer ripples or swollen particleboard edges that flat overhead lighting completely hides.
For dark fabrics, black leather, or deep closet corners where dark-pigmented mold blends into the background, include a neutral gray scale or clean white reference card at the edge of the macro frame so color balance stays true under audit-ready documentation rules.
- Disable auto-flash inside containment: Rely on tripod-mounted diffused area LEDs plus a handheld raking beam for macro shots.
- Shoot three distances per cluster: Capture wide room context, mid-range item identification, and 6-to-12-inch oblique surface detail.
- Differentiate dust from hyphae: Show filamentous branching, localized circular colony margins, or moisture-tide rings in macro focus.
Pairing Photos With Psychrometric, Moisture, and IEP Telemetry
Photographs prove what is on the surface; environmental readings prove why it grew and how far it spread. Whenever crews document contents inside an affected room, they should pair visual captures with calibrated thermo-hygrometer readings (ambient temperature, relative humidity, and calculated dew point) and wood-equivalent moisture readings on furniture frames, subfloors, and baseboards.
Putting the live digital meter screen directly inside a secondary photo frame—beside the warped dresser panel or damp box spring—eliminates any dispute about which room or asset generated the log. Under US EPA IAQ principles and ANSI/IICRC S520, pairing persistent elevated moisture (>16% wood moisture equivalent or sustained >60% ambient RH) with colony photos anchors causation cleanly.
When an independent Indoor Environmental Professional collects tape-lift, swab, or air-cassette samples, photograph the sample number marker next to the corresponding furniture cluster so lab results tie directly to the contents schedule.
- In-frame meter proof: Photograph calibrated moisture meters and hygrometers touching the exact damaged asset or room threshold.
- Cross-reference IEP sample IDs: Log lab sample numbers alongside room IDs and line-item barcode ranges.
- Timestamp consistency: Keep camera clocks and psychrometric data loggers synced to local loss-site time before walkthrough.
Documenting Hidden Undersides and Pre-Disposal Identity Inside Containment
On microbial losses, the cleanest side of a piece of furniture is almost always the side facing the camera when a crew first enters the room. Mold colonies thrive in stagnant microclimates—the dark gap behind a headboard, the unsealed pressed cardboard backing of a bookcase, the cloth dust barrier underneath a sofa, and the underside of a box spring resting over damp carpet.
Before any porous asset is condemned or sealed in 6-mil poly for haul-off, technicians inside containment must tilt or inspect hidden undersides under HEPA negative air and photograph both the hidden fungal growth and the manufacturer’s tag, model plate, or material label. Doing so in sequence prevents crews from disturbing spores twice and locks down brand/tier proof required under ANSI/IICRC S320.
For high-volume closet textiles or boxed paper archives that must be discarded in bulk lots, lay out representative colonized items clearly on poly sheeting with count cards visible before double-bagging so the adjuster can verify both item quantity and material quality.
- Flip only under negative air: Never tip moldy sofas or mattresses until HEPA air scrubbers are running inside containment.
- Capture law tags & OEM plates: Photograph sewn mattress labels, sofa manufacturer tags, and appliance rating plates alongside damage macros.
- Lot-count transparency: Photograph fanned-out shoes, books, or folded garments with a legible room/lot placard prior to bagging.
Containment-Safe Device Hygiene and Evidence Chain of Custody
Field tablets, cameras, and laser barcode scanners carried from a Condition 3 mold basement straight onto a clean kitchen counter or into a crew cab become physical vectors for cross-contamination. Forensic photography inside microbial zones requires strict device hygiene so documentation tools never carry spores into Condition 1 areas.
Use dedicated, wipeable protective cases or sealed clear poly sleeves over cameras and tablets while shooting inside Condition 2/3 containment, wear clean nitrile gloves, and damp-wipe device exteriors inside the decontamination airlock before exiting. Never set inspection gear directly onto colonized carpet or upholstery.
Once synced to the claim folder, preserve original EXIF timestamps and pair every photo group with its room Condition code, item barcode or lot ID, and technician initials. Maintaining unbroken traceability from containment capture to desk review ensures EPA-aligned disposal decisions hold up under carrier audit.
- Sealed device sleeves: Enclose mobile capture devices in disposable clear barrier sleeves inside Condition 3 containment.
- Airlock wipe-down: Sanitize camera housings, tripods, and moisture-meter probes when exiting dirty work zones.
- Immutable photo indexing: Never rename or strip EXIF metadata; link photo IDs directly to room and inventory line numbers.
Practitioner Verification Checklist (G-21)
- Turn off flat on-camera flash and shoot all faint fungal colonies, leather bloom, and wood warping using 15–30 degree raking LED light.
- Capture wide room-context shots showing the moisture source and S520 Condition boundary alongside every macro damage photo.
- Frame calibrated hygrometer (RH/temp) and pin/pinless moisture meter screens directly beside damaged contents and IEP sample markers.
- Photograph hidden undersides, raw cabinet backs, and OEM/law tags inside negative-air containment prior to bagging non-salvageable items.
- Protect cameras and tablets in wipeable sleeves inside Condition 2/3 zones and sanitize gear at the airlock before entering Condition 1 spaces.
Standards, Authority References & Related Reading
Primary standards, insurance definitions, and sibling Restoration Intel guides referenced in this brief:
- ANSI/IICRC S520 Mold Remediation Standard
- ANSI/IICRC S320 Standard for Professional Contents Restoration
- US EPA Mold Remediation in Schools and Commercial Buildings / Guide
- US EPA Indoor Air Quality (IAQ)
- Related Guide: Mold & Prolonged Humidity Microbial Losses: First-24-Hour Contents Triage & Stabilization
- Related Guide: Mold & Prolonged Humidity Microbial Losses: Non-Salvageable vs Restorable Criteria
- Related Guide: Mold & Prolonged Humidity Microbial Losses: Pack-Out Sequencing & Cross-Contamination Containment
- Related Guide: Mold & Prolonged Humidity Microbial Losses: Carrier Scope Justification & Total-Loss Defense
- Related Guide: Two Standards, One Truck: Documentation When the Brand and the Scorecard Disagree
.md twin for desk QA and team training.Frequently Asked Questions
Why do mold photos taken with a standard phone flash often get rejected by desk adjusters?
Direct flash flattens surface texture and washes out pale white or gray fungal filaments against light upholstery and drywall. Shooting without flash under an angled 15-to-30-degree raking light reveals the three-dimensional hyphal mat clearly.
What environmental measurements should accompany mold contents photographs?
Pair damage photos with room temperature, relative humidity, dew point, and moisture-content readings on wood furniture frames or adjacent flooring, plus sample numbers if an IEP collected tape-lifts or air samples.
How should crews photograph mold on the underside of a sofa or mattress safely?
Wait until negative-pressure HEPA air filtration and 6-mil poly containment are active, wear fit-tested P100 PPE, tilt the item carefully inside containment, and capture both the hidden Condition 3 growth and the manufacturer tag before bagging.
How do teams prevent cameras and tablets from spreading mold spores between rooms?
Place capture devices inside clear disposable protective sleeves or wipeable rugged cases, keep them off colonized surfaces, and damp-wipe exteriors inside the decontamination chamber before moving to Condition 1 rooms.