Direct Answer: Follow a locked clockwise, ceiling-to-floor, exterior-to-interior cavity sequence inside every room — logging perimeter furnishings first, upper cabinets and closet shelves second, and lower drawers, under-sink cavities, and floor bins last — so multi-tech crews eliminate missed storage zones and duplicate uploads.
.md twin for estimator QA and carrier file documentation.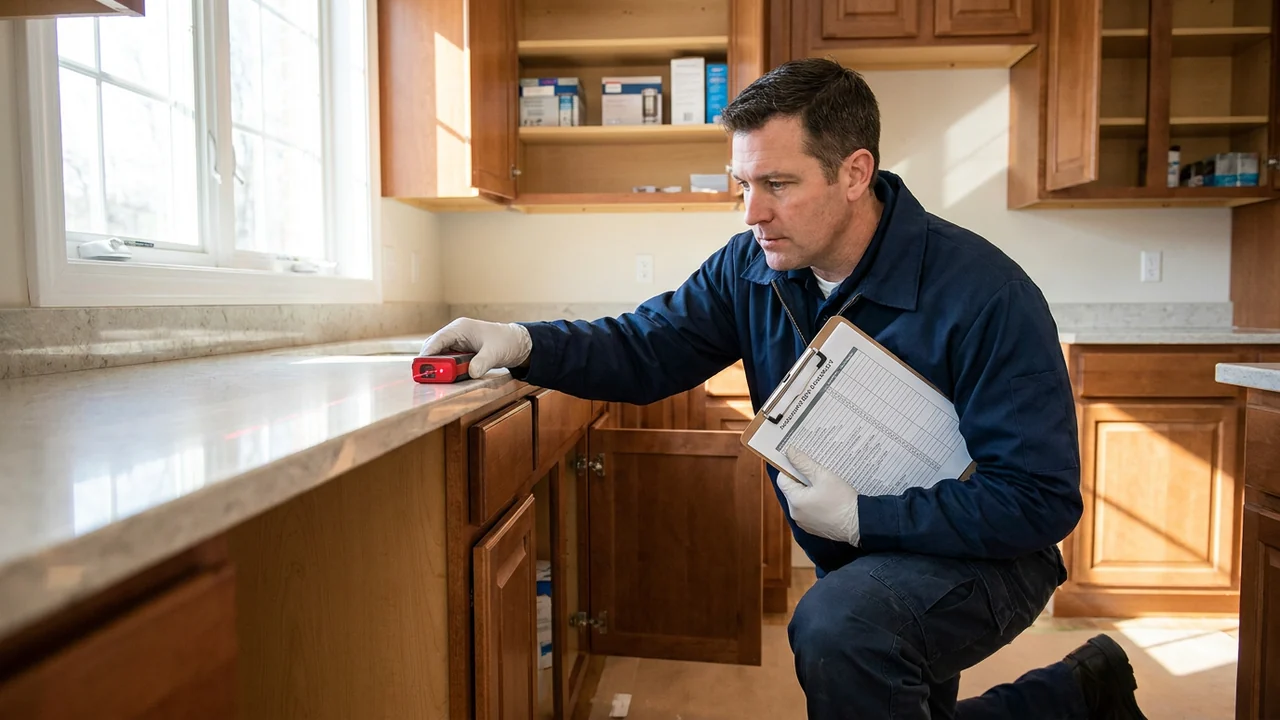
Most inventory misses do not happen in the middle of a living room. They happen in the second closet of a spare bedroom, behind a bathroom vanity pipe, or inside the upper left cabinet above a refrigerator after two technicians assume the other person already photographed that wall. When field capture relies on personal habit instead of a universal room-by-room order, recall collapses under smoke, low light, or tight pack-out deadlines.
This Field Guide establishes a single deterministic capture path aligned with ANSI/IICRC S320 documentation discipline. Every crew lead and technician follows the same directional sweep, vertical layer order, and boundary-marker handoff so estimating desks and warehouse receiving benches reconcile 100 percent of visible and concealed household contents without return trips.
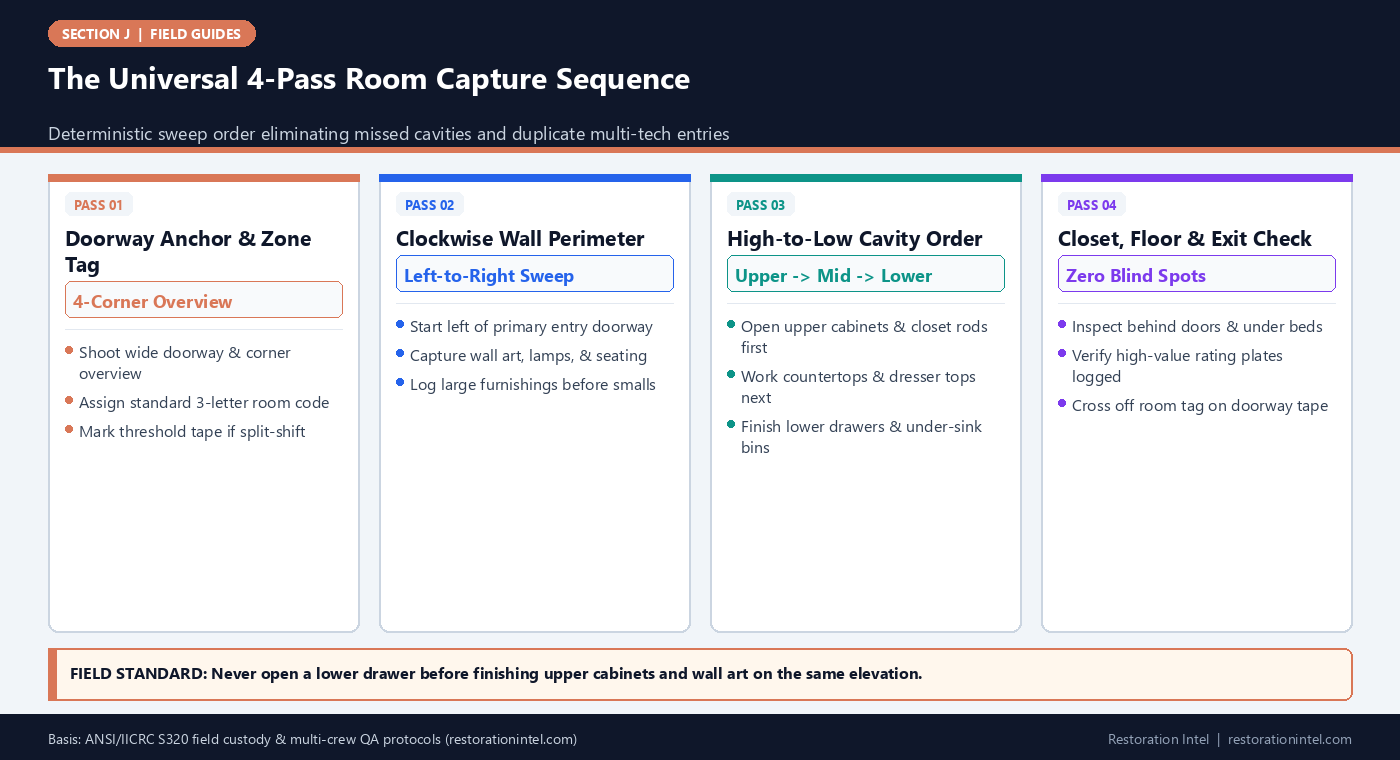
The Universal 4-Pass Room Capture Sequence
Room-by-Room Capture Order & Cavity Verification Matrix
Use this room sequence on residential and light-commercial pack-outs to standardize doorway anchors, storage sweeps, and high-miss check points.
| Order & Room Type | Code Prefix | Primary Sweep Start Point | High-Miss Concealed Zones | Mandatory Proof Before Exit |
|---|---|---|---|---|
| 1. Entry, Foyer & Hallways | ENT / HAL | Left of front threshold moving clockwise | Coat closet top shelves, shoe benches, umbrella stands, attic pull-down landings | Wide hall elevation + closet interior open-door shot |
| 2. Living & Family Rooms | LIV / FAM | Left of primary entry archway | TV console rear cables, ottoman storage wells, built-in bookcase lower doors | 4-corner room set + AV rear model plates + fireplace mantel close-up |
| 3. Kitchen & Pantry | KIT / PNT | Left of refrigerator or kitchen entry | Over-fridge cabinet, lazy Susan corners, under-sink cleaning bins, island drawers | Upper/lower open-door sequence + appliance data plates + pantry shelf density |
| 4. Dining & Breakfast Nook | DIN / BRK | Left of dining entrance | China hutch lower buffets, silverware drawer inserts, leaf storage under table | Tabletop + chair set count + china pattern / backstamp macro |
| 5. Primary & Secondary Bedrooms | MBR / BR2 | Left of bedroom door moving clockwise | Under-bed bins, nightstand bottom drawers, walk-in closet top shelves & shoe racks | Bed frame/headboard + open closet rod span + dresser drawer progression |
| 6. Bathrooms & Laundry | BTH / LND | Left of bathroom entry door | Medicine cabinet mirrors, vanity U-trap cavities, linen tower top shelf, lint/pedestal drawers | Vanity open-cabinet shot + washer/dryer plates + excluded prescription check |
| 7. Garage, Basement & Utility | GAR / BSM | Left of interior access door | Overhead rafters, pegboard smalls, workbench drawers, locked tool chests, deep freezers | Wall-bay wide shots + tool chest drawer-by-drawer + mechanical plates |
Setting the Room Boundary and Doorway Anchor Before Touching Contents
Every room capture begins on the threshold before a single box is opened or a blanket is draped. The lead technician takes a wide horizontal anchor photo looking straight into the room from the primary doorway, followed by reverse-corner shots once inside so the estimating desk can reconstruct spatial context weeks later. This four-corner baseline proves pre-pack density and establishes whether items sat on shelves, inside sealed totes, or directly on wet flooring.
Immediately after the anchor photos, the technician places a strip of low-tack painter’s tape at eye level on the hinge side of the doorway marked with the standardized room code and tech initials. As emphasized in A Pack-Out Record Is Not a Priced Inventory, the site record only stays auditable when physical room boundaries match the digital schedule line for line.
- Doorway anchor rule: Capture all four corners unobstructed before moving furniture toward the center staging path.
- Single room-code discipline: Never rename a bonus room or den mid-job; copy the code from the master walkthrough map.
- Threshold tape status: Write OPEN on doorway tape while capture is active and strike through with DONE and timestamp only after final sweep.
Executing the Clockwise Perimeter and High-to-Low Cavity Progression
Once inside the room, move strictly clockwise starting from the wall immediately left of the entry door. Complete every wall fixture, framed piece, window treatment, and floor-standing piece along that elevation before pivoting to the next wall. Resist the common impulse to jump across the room toward a high-value television or heirloom cabinet; breaking directional order is the leading cause of skipped corners when crews pause for lunch or shift changes.
At each cabinet bank, bookcase, or dresser, work vertically from top to bottom. Open upper wall cabinets or top closet shelves first, photograph the interior contents before pulling items out, then step down to counter surfaces, middle drawers, and finally base cabinets or floor-level bins. Gravity and visual attention naturally pull crews downward; clearing the top tier first guarantees overhead shelves and closet headers are never left behind.
- Top-down drawer discipline: Pull dresser and desk drawers starting from the top drawer down, closing each drawer after logging.
- Open-door proof photo: Photograph every cabinet, pantry, and closet interior with doors wide open before packing begins.
- Rear-cavity sweep: Use a pocket inspection light inside corner lazy Susans, under-sink plumbing bays, and deep pantry shelves.
Handling Closets, Adjoining Baths, and Built-In Storage Without Overlap
Closets, en-suite bathrooms, and walk-in pantries create frequent boundary confusion on multi-room losses. Treat any space with a swinging or sliding door and at least 12 square feet of floor area as its own child zone linked to the parent room (for example, MBR-CL1 or KIT-PNT) rather than blending items into the main room manifest. Reached-in wall closets under four feet wide stay under the parent room code but must appear sequentially right after the wall elevation they sit on.
When packing hanging garments or dense shelf stacks, photograph the linear span with a reference scale or count garments by category sub-lots (suits, coats, dress shirts, footwear pairs) before compressing into wardrobe boxes. As noted in The Hands Were Always the Bottleneck, clean sub-lot capture at the closet door saves estimators hours of guesswork when translating box manifests into carrier lines.
- En-suite boundary rule: Log adjoining master baths and walk-in closets under explicit child codes so reset crews place boxes back accurately.
- Behind-the-door sweep: Swing every room and closet door fully shut during the exit check to expose hooks, ironing boards, and shoe racks.
- Under-bed and loft check: Drop to knee level with a flashlight under every bed frame, sofa skirt, and workbench before clearing the room.
Coordinating Multi-Tech Zone Splits and Final Exit Gate
On large residential homes or commercial suites, multiple technicians often work simultaneously to beat secondary mold or corrosive soot deadlines. Never assign two technicians to opposite walls of the same room without a physical zone divider and separate sequential box-number blocks. Instead, assign complete rooms per technician whenever square footage allows, or split strictly by pre-marked wall elevations recorded on the doorway tape.
Before leaving any room, the lead technician performs a 60-second empty-cavity exit check: every cabinet door ajar by two inches or taped clean, zero forgotten drawers, and every high-value appliance or electronic item cross-checked for a readable rating plate. Only after that visual sweep does the doorway tape receive a final slash and time stamp.
- Room-ownership rule: One lead technician owns each room’s capture record from threshold photo to final exit sign-off.
- Shift-change bookmark: If a room pauses mid-sweep, tape a bright marker directly onto the next unopened cabinet or drawer.
- Crew-lead spot audit: Spot-check at least one concealed cavity (under-sink, top closet shelf, or bottom drawer) in every cleared room.
Practitioner Verification Checklist (J-01)
- Capture four-corner room anchor photos and place the coded doorway tape marker before opening any cabinet or packing any box.
- Sweep strictly clockwise from left of the primary entry doorway and work vertically from upper shelves down to floor level.
- Assign explicit child codes for walk-in closets, pantries, and en-suite baths so box manifests map cleanly during reset.
- Photograph open cabinet, drawer, and closet interiors before pulling items into pack-out containers.
- Perform a 60-second behind-door, under-bed, and corner-cavity sweep before signing off the doorway tape as complete.
Standards, Authority References & Related Reading
Primary standards, insurance definitions, and sibling Restoration Intel guides referenced in this brief:
- ANSI/IICRC S320 Standard for Professional Contents Restoration
- Restoration Industry Association (RIA)
- Verisk XactContents Platform Overview
- ANSI/IICRC S700 Fire & Smoke Restoration Standard
- Related Guide: Field Guide: Rating-Plate Locations Cheat Sheet Across Appliances, HVAC, Shop Gear, and Electronics
- Related Guide: Field Guide: Standard Abbreviations and Box-Labeling Taxonomy for Multi-Crew Vaults
- Related Guide: Field Guide: Pre-Pack Inspection of Pre-Existing Damage and Wear-and-Tear Documentation
- Related Guide: A Pack-Out Record Is Not a Priced Inventory
- Related Guide: The Hands Were Always the Bottleneck
.md twin for desk QA and team training.Frequently Asked Questions
Should crews photograph furnishings before or after packing small items off tabletops?
Always capture wide four-corner room anchors and tabletop/countertop context photos before clearing smalls. That sequence preserves spatial proof of where breakables, lamps, and electronics sat at the time of loss.
How do you keep two technicians from logging the same closet or cabinet twice?
Assign whole rooms to individual technicians whenever possible. When two techs must split one large room such as a garage or kitchen, divide by numbered wall elevations on the doorway tape and allocate non-overlapping box ID blocks.
Why work upper cabinets before lower drawers instead of finishing one cabinet stack at a time?
Working upper tiers across an elevation before lower drawers prevents visual fatigue from hiding overhead shelves above refrigerators, laundry machines, and closet rods — the top blind spots in residential audits.
Do walk-in closets need their own room code in XactContents or Symbility?
Yes. Treating walk-in closets and pantries as distinct sub-rooms or child zones keeps dense apparel, shoe, and pantry schedules organized and ensures warehouse reset crews stage boxes in the right room.